
Disclosure: This guide contains one affiliate link and a discount code. If you buy through them, She Chooses Well may earn a commission at no extra cost to you. Prices were checked on Venalisa’s store on 13 November 2026 and are shown in approximate USD; the store displays your local currency.
A gel manicure that lasts two to three weeks without chipping is one of the small luxuries that’s easy to do at home once you have the right kit and technique. The savings add up quickly compared with salon visits. But at-home gel has a side that rarely makes it into tutorials: done carelessly, it’s one of the most common ways people develop a lasting allergy to acrylates, the ingredients that make gel work.
This guide covers what you need, a step-by-step application that actually lasts, how to remove gel without wrecking your nails, and the ingredient terms (HEMA-free, TPO-free) worth understanding before you buy.
What gel polish actually is
Gel polish is a liquid mixture of acrylate monomers and oligomers plus a photoinitiator. Under UV or LED light, the photoinitiator triggers a chemical reaction that links the molecules into a hard, flexible film. That’s why gel doesn’t air-dry like regular polish: it has to be “cured” under a lamp. It also explains the two biggest safety points: uncured gel on skin can cause allergy, and the lamp has to be matched to the product so it cures fully.
Gel vs regular polish vs builder gel vs acrylic
| Regular polish | Gel polish | Builder / hard gel | Acrylic or acrylic gel | |
|---|---|---|---|---|
| Wear time | A few days | About 2–3 weeks | 3+ weeks with infills | 3+ weeks with infills |
| Needs a lamp | No | Yes | Yes | Depends on system |
| Adds strength/length | No | A little | Yes | Yes |
| Beginner-friendly | Very | Yes, with practice | Moderate | Harder |
| Removal | Polish remover | Soak-off | Filing and/or soak-off | Soak-off and filing |
For most beginners, soak-off gel polish on natural nails is the right starting point. Move on to builder gels or extensions once you’re confident with prep and curing.
What you need to start
| Item | Why it matters |
|---|---|
| UV/LED lamp | Cures the gel. LED lamps cure faster; check the brand’s recommended curing time for your lamp. |
| Base coat | Bonds gel to the nail; the most important layer for longevity. |
| Gel colours | Two or three shades you’ll actually wear beat a 60-colour kit. |
| Top coat | Seals and adds shine. “No-wipe” top coats don’t leave a sticky layer. |
| Prep tools | Cuticle pusher, fine nail file and buffer, lint-free wipes, and a cleanser or isopropyl alcohol. |
| Removal supplies | Acetone or a gel remover, foil wraps or clips, cotton pads and a wooden stick. |
Step-by-step: a gel manicure that lasts
- Prep the nail. Gently push back cuticles and remove any dead skin on the nail plate. Shape with a file, then lightly buff the shine off the nail surface. Don’t over-buff; you’re removing shine, not thinning the nail.
- Dehydrate. Wipe each nail with a cleanser or isopropyl alcohol to remove oils and dust. Don’t touch your nails after this step.
- Apply a thin base coat. Keep it off the skin and cuticles; leave a hairline gap. “Cap” the free edge by running the brush along the tip. Cure.
- Apply colour in thin layers. Two or three thin coats cure better and last longer than one thick coat. Cap the edge each time and cure after every layer.
- Finish with top coat. Apply, cap the edge and cure. If it’s not a no-wipe formula, wipe off the sticky layer with cleanser.
- Clean up skin. If any gel touched your skin before curing, remove it immediately with a cleanser-soaked wipe.
Why gel lifts or peels (and how to fix it)
| Problem | Usual cause | Fix |
|---|---|---|
| Lifting at the cuticle | Gel touching skin, or cuticle not cleaned off the nail plate | Better prep; leave a hairline gap |
| Chipping at the tips | Edges not capped | Run the brush along the free edge on every layer |
| Wrinkling or bubbles | Layers too thick | Thinner coats, cured separately |
| Sticky or soft finish | Under-curing, or lamp not matched to the gel | Follow recommended cure times; check your lamp |
| Peeling off in one sheet | Oils or moisture on the nail | Dehydrate properly; don’t touch nails after prep |
The allergy issue: why HEMA-free matters
Dermatologists have reported a rise in allergic contact dermatitis to acrylates linked to at-home gel kits. The most frequently implicated ingredient is HEMA (2-hydroxyethyl methacrylate), a small molecule that penetrates skin easily. Allergy typically develops after repeated skin contact with uncured gel and shows up as itching, redness, swelling or blistering around the nails and fingertips, sometimes on the eyelids or face.
The difficulty is that acrylate allergy is usually permanent, and it can affect more than manicures: the same family of chemicals is used in some dental materials, medical adhesives and devices. That’s a strong reason to:
- Never let uncured gel touch your skin, and clean it off immediately if it does.
- Cure fully, using a lamp suited to the product.
- Consider HEMA-free formulas, which reduce exposure to the most common allergen (though other acrylates can still cause allergy).
- Stop and see a doctor if you notice itching or a rash around your nails after a manicure. Patch testing can identify the cause.
In the EU, nail products containing HEMA must be labelled for professional use only, reflecting regulators’ concern about at-home exposure.
What “TPO-free” means
TPO (trimethylbenzoyl diphenylphosphine oxide) is a photoinitiator that has been widely used in gel polishes to help them cure. It has been classified in the EU as toxic to reproduction, and its use in cosmetic products, including nail gels, has been banned in the EU since September 2025. Brands selling into Europe have reformulated with alternative photoinitiators, and many now label products “TPO-free”. If you’re buying from any market, choosing TPO-free formulas is a sensible precaution.
Choosing a lamp
Not every lamp cures every gel equally well. Gels are formulated to react to specific wavelengths, so the safest choice is a lamp sold by, or recommended by, the brand of gel you use. Beyond that, look for a lamp large enough to fit all four fingers flat with the thumb separately, a built-in timer with 30- and 60-second settings, and an auto-sensor so it switches on when your hand goes in. Higher wattage doesn’t automatically mean better results; a mismatched lamp can cure the surface while leaving the layer underneath soft, which causes peeling and increases the risk of allergy.
Signs of under-curing include a tacky surface after the top coat (on a no-wipe formula), wrinkling, and gel that dents when pressed. If you see these, check your lamp, cure times and layer thickness before buying a new polish.
Removing gel without damaging your nails
- File off the shiny top coat lightly so remover can penetrate. Don’t file down to the nail.
- Soak cotton in acetone or a gel remover, place it on each nail and wrap with foil or clips.
- Wait 10–15 minutes. Keep hands warm; it speeds things up.
- Gently push off the softened gel with a wooden stick. If it doesn’t lift easily, re-wrap for a few more minutes.
- Never peel or pick. Peeling removes layers of the nail plate with the gel, which is the main reason people think gel “ruins” nails.
- Moisturise with cuticle oil and hand cream afterwards.
Nail art basics once you are confident
Once a plain manicure lasts, simple designs are easy to add: a thin French tip painted with a fine liner brush, a single accent nail in glitter, or “cat eye” magnetic gels that create a shimmer line when you hold a magnet over the uncured layer. Cure every design element before adding the top coat, and keep designs inside the nail edge so the top coat can seal them.
Is the UV lamp safe?
Nail lamps emit UVA. Studies suggest the exposure per manicure is low, but because it’s repeated over years, many dermatologists recommend precautions: apply a broad-spectrum sunscreen to your hands about 20 minutes before, or wear fingerless UV-protective gloves, and stick to recommended curing times rather than extra “just in case” cures.
Keeping natural nails healthy between manicures
- Take breaks. A week or two without gel every couple of months lets you check the condition of your natural nails.
- Oil daily. Cuticle oil keeps the nail and surrounding skin flexible and reduces lifting at the edges.
- Wear gloves for cleaning. Detergents and long soaks in water weaken both gel adhesion and natural nails.
- Don’t use nails as tools. Opening cans or scraping labels is the fastest way to chip gel and split nails underneath.
- Watch for warning signs. Nails that become very thin, painful, discoloured or separate from the nail bed need a rest and, if they don’t recover, a doctor’s opinion.
Choosing colours that work for you
If you’re building a small collection, start with versatile shades: a sheer nude close to your natural nail colour (it hides regrowth best), a classic red, and one deeper shade for colder months. Sheer and milky shades are the most forgiving for beginners because small application mistakes and regrowth are less visible. Very dark and very bright colours show every imperfection at the cuticle, so save them for when your technique is steady.
A realistic cost comparison
A home setup with a lamp, base and top coats, remover and a few colours typically costs about the same as one or two salon gel manicures. After that, each manicure costs very little in product. The trade-off is time and skill: expect your first few attempts to take 45–60 minutes and to last a little less long than a salon set. Most people improve quickly once they master thin layers and capped edges.
A closer look: Venalisa gel products
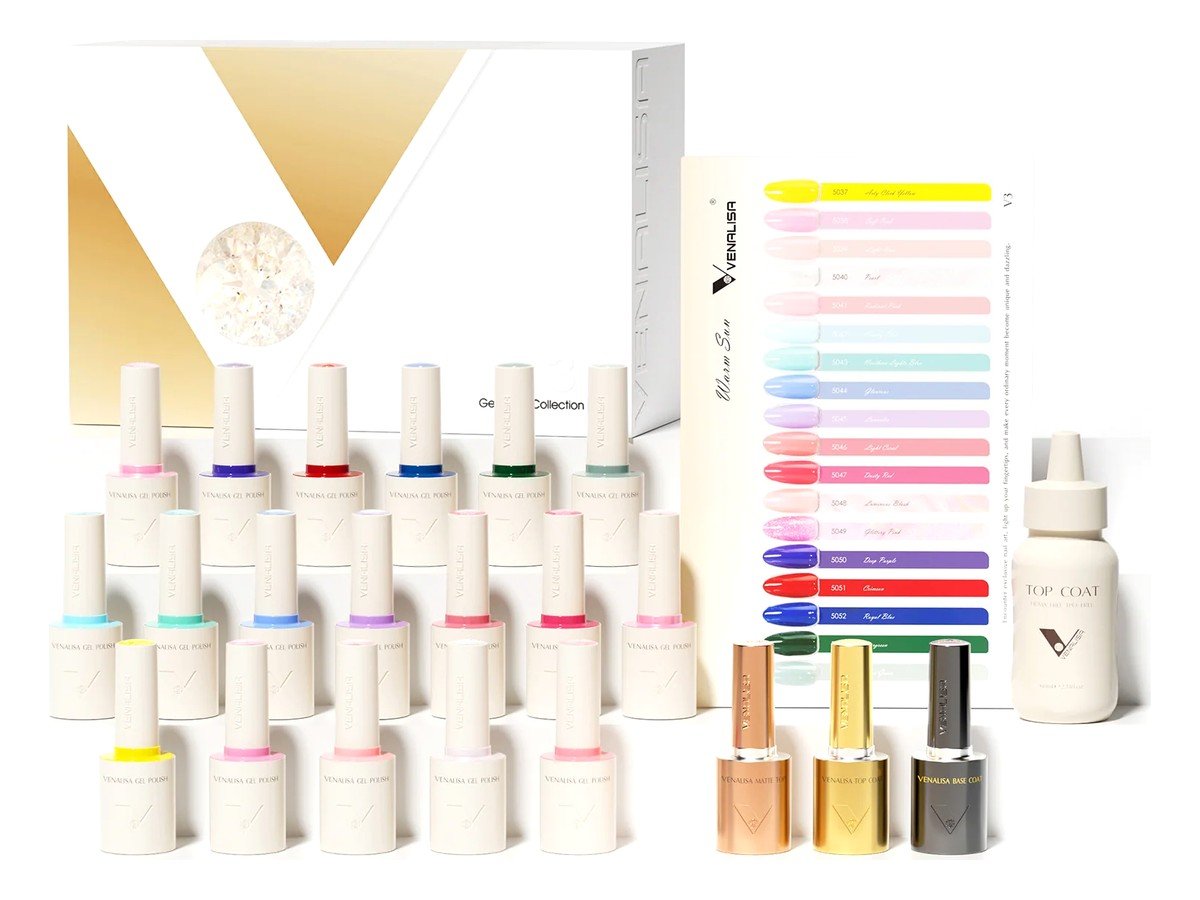
Venalisa is a nail brand selling gel polishes, base and top coats, builder and acrylic gels, lamps and tools. A large part of its range is labelled TPO-free and HEMA-free, which fits the safety points above. It sells both single colours and kits.
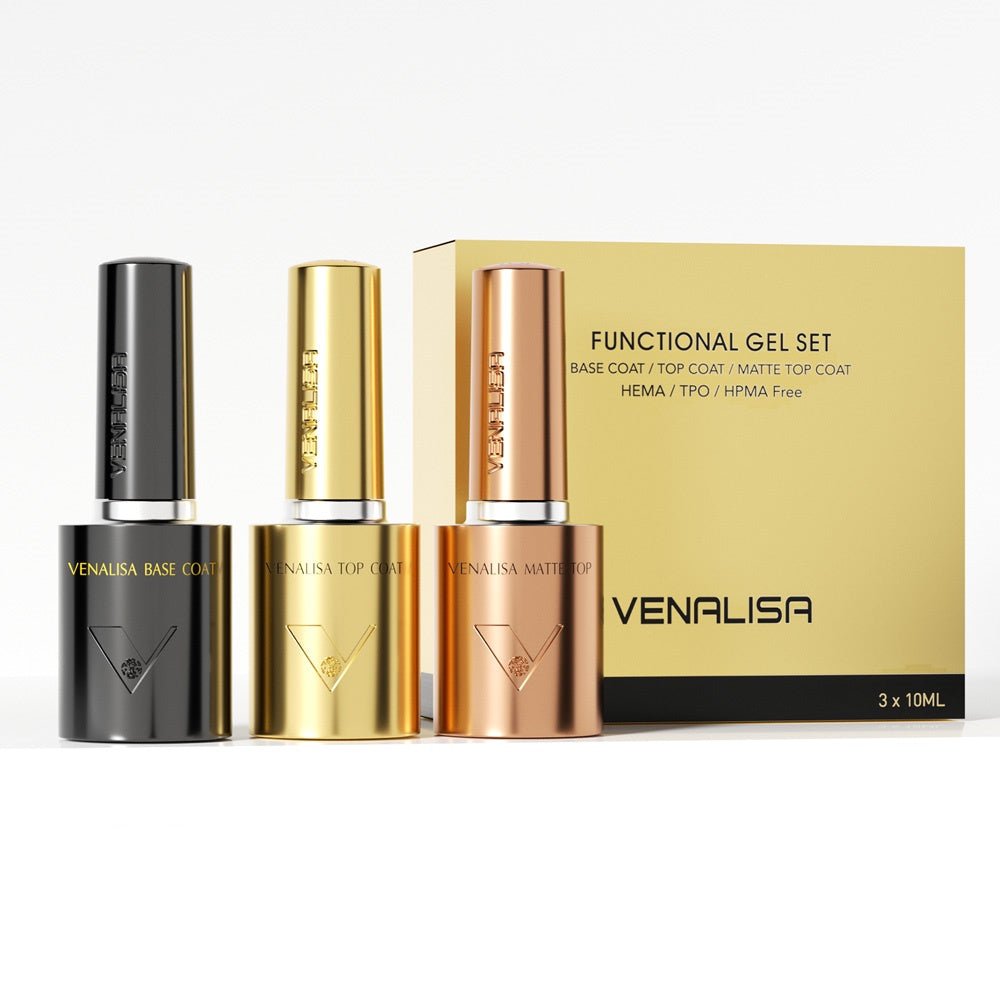
Images: Venalisa
| Product | Notes (per Venalisa) | Approx. price (USD) |
|---|---|---|
| Single gel polish, 10 ml | Many colours labelled TPO-free and HEMA-free | ~$4.50 |
| Base coat, no-wipe top coat and matte top coat set (3 × 10 ml) | TPO-free, HEMA-free | ~$13.90 |
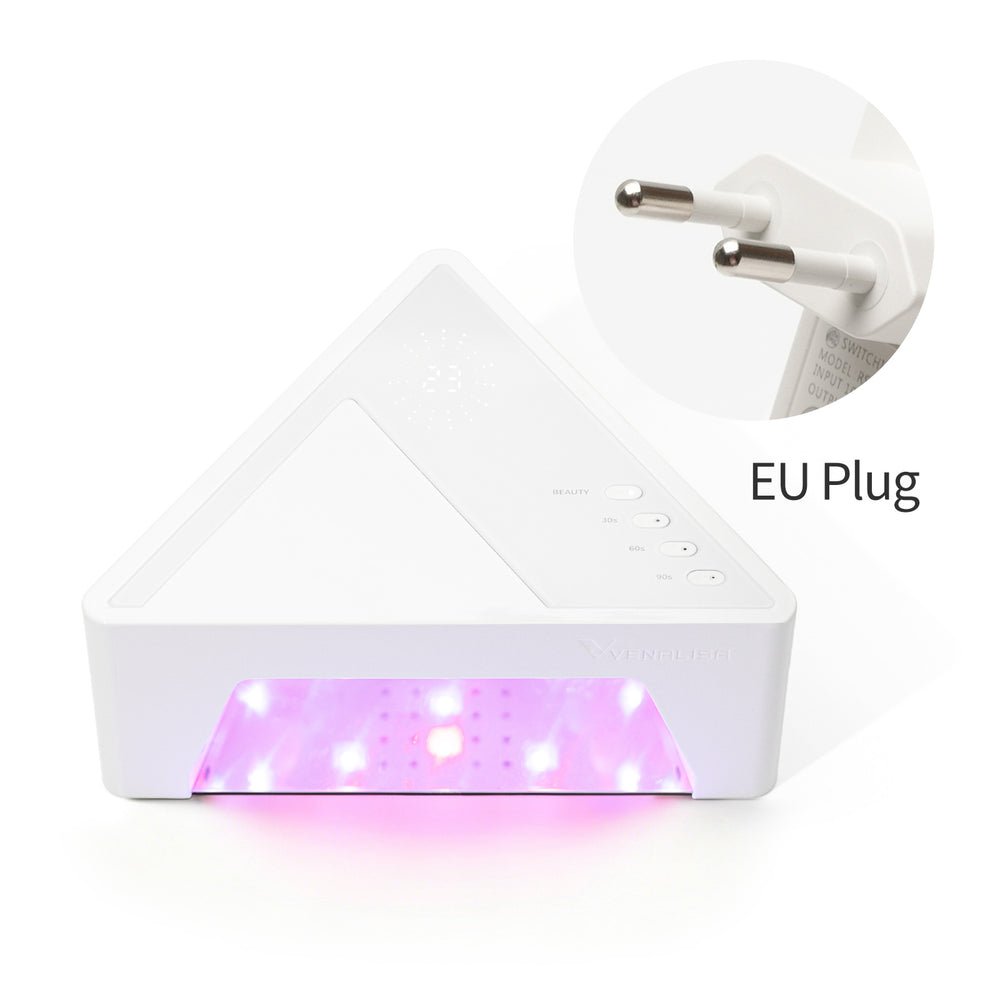
| UV/LED Red Light Nail Lamp | Lamp for curing gel | ~$49.00 |
| Natural Nude Series Gel Kit (15 pcs) | Curated nude colour set | ~$79.90 |
| Acrylic Gel 4-in-1 Kit | For extensions and strengthening; TPO-free, HEMA-free | ~$25.00 |
| Gel remover | For soak-off removal | ~$7.90 |
A sensible starter order
Rather than a large colour kit, start with a lamp, the base-and-top set, two or three single colours and a remover. That keeps your first order modest while covering every step above. If you love it after a few manicures, a curated kit makes sense.
Things to know before ordering
- Processing: orders are typically processed within 1–2 business days (longer during sales and holidays), then shipped with tracking.
- Returns: Venalisa has a 14-day return window for items in unused, unopened condition with original packaging. Opened polish usually can’t be returned, so choose colours carefully.
- “Free from” labels don’t mean allergy-proof. HEMA-free products still contain other acrylates. The skin-contact rules above apply whatever you buy.
How to buy and save at Venalisa
- Use the code HELLO at checkout for 10% off.
- Buy the essentials first (lamp, base, top, remover), then add colours.
- Check for TPO-free and HEMA-free labels on each product page before adding to your basket.
Enter HELLO in the discount field and confirm the reduced total before paying.
Shop Venalisa gel nails – code HELLO for 10% off
Sources (checked 13 November 2026): Venalisa product pages and pricing for gel polishes, base and top coats, lamp, kits and remover; Venalisa Shipping Policy and Return & Refund Policy (venalisa.com). Information on acrylate allergy, HEMA and nail lamp UV exposure reflects published dermatology guidance; regulatory information on TPO and HEMA reflects EU cosmetics regulation.